Painting like a pro
< Back
5 MINS
Painting Essentials
Painting Essentials | November 26, 2020
November 26, 2020
Share via
It’s at the core of who we are to make painting stress-free and simple, which is why we put together everything you need to know about preparing for, and painting like a pro. When it comes down to it, the success of any paint job relies heavily on the preparation that you do, and although you’re probably super excited to get started (we get it!), there is value in taking the time to ensure your surfaces are in prime condition before beginning.
Simple tip
Depending on the state of your walls, the extent of prep work may vary, so don’t feel compelled to follow every step outlined below.
Smooth those surfaces
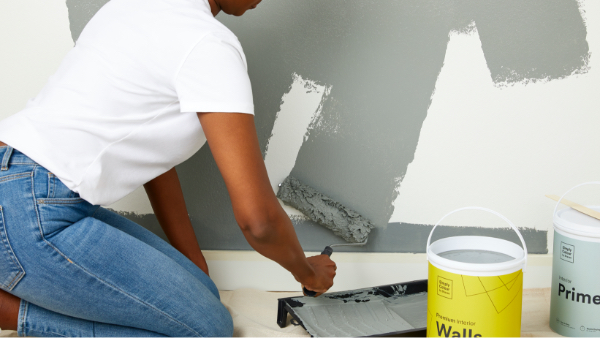
Firstly, you’ll need to remove any loose or flaking paint on your walls using a paint scraper. This is essential for creating a smoother surface to work with. In some cases, you may even need to repair cracks and imperfections using crack filler (ours is pre-mixed, which means it’s as simple as stirring and starting, yay!).
Next, you’ll need to lightly sand the walls using one of our sanding blocks. Smoothing surfaces properly prior to painting will help the paint adhere better (and avoid the frustration of future chipping and peeling). The sanding process is especially important if your walls were previously painted using a sheen or glossy finish. Remember to wipe down the surfaces after sanding.
Then, you may need to apply an appropriate primer (especially if your walls are exposed brick or in very poor condition). Our primer is a quick-drying two-in-one product – priming and sealing your surfaces simultaneously, which will make this part of the prep work even quicker than before.

Scrape off old paint Apply Crack Filler Smooth surfaces with a Sanding Block Prime your wall


Before you begin painting
Make sure you have a drop sheet. This handy little guy is a mess-preventing must-have for any paint project and is basically the only way to make sure that your floors, carpets and furniture are protected against potential drips, splatters and spills.
If you’re looking for precise lines and professional results, masking tape is your magic trick. It’s perfect for when you’re painting trims and windowsills too. Just remember, there’s a prime time to remove the tape and it’s just before the paint on your walls is completely dry. Why? Done at this point, your paint won’t peel off with it and those teeny smudges can be fixed whilst the paint is still slightly wet.
By the way, if you do decide to take five during the job, cover your paint tray and roller using a sheet of plastic or a plastic bag to prevent them both from drying out.
Simple tip
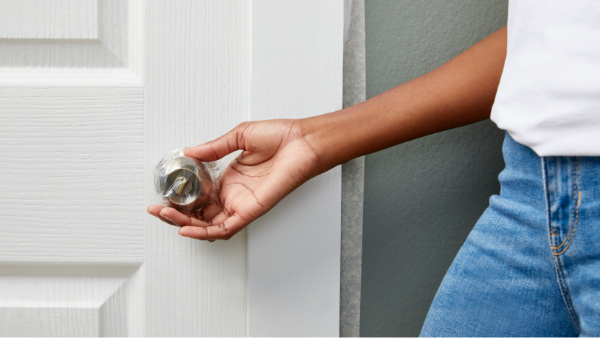
For doorknobs, try wrapping small plastic bags around them and sealing them shut with tape.
If you can, remove light switches and outlet covers for a more professional finish.
Time to brush up
Choosing the right tools can decrease the pressure (and take the pain out) of doing a great painting job. This is especially important when it comes to your choice of brushes and rollers.
Whether it’s a smaller sized brush for cutting in or paintwork on trims and smaller surface areas, you’ll need a brush with quality bristles that aren’t going to shed throughout the process. There’s nothing more frustrating than wasting time trying to repair your tools rather than focusing on the job. The same applies to your medium size paint brushes.
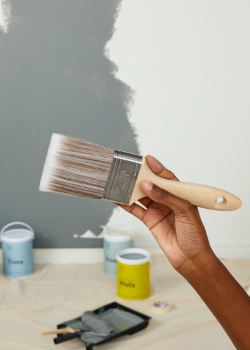
Hold the brushes firmly in your hand, not by the handle, but at the spot where the bristles meet the metal. That way you’ll have total control over the direction and pressure of the bristles (which means better results). And remember, you only need to dip your brush one third of the way into your paint!
As a way to keep the rim of your paint tin drip-free, wrap an elastic band across the height of the tin and use it to remove excess paint from your brush whilst painting.

How to hold your brush How to keep the paint tin drip-free

Just roll with it
Just like your brush, the roller you choose is equally important. We offer a professional classic roller that’s 225mm wide – the perfect size for painting the tops of interior walls and your ceilings too. It’s tightly woven to ensure that paint is absorbed and released evenly, giving you a smooth and professional finish. And of course, along with the quality roller comes its handy sidekick – the extension pole for those hard-to-reach tops of walls that need an even application as well.
Investing in an extension pole gives you the bonus of saving time and a whole lot of pain and discomfort that comes from climbing up and down a ladder.
Pick the premium
Remember, the better the quality of the paint, the less you’ll most likely need, the fewer coats you’ll have to paint, and the longer lasting the results will be. Our Premium paint is an ideal choice for your interior updates, and its anti-bacterial formula is one you can rely on to produce professional-looking and healthier results.
No matter what kind of paint you’re using, always stir it with a flat paddle before you begin, that way the paint is properly mixed, and the application is even.
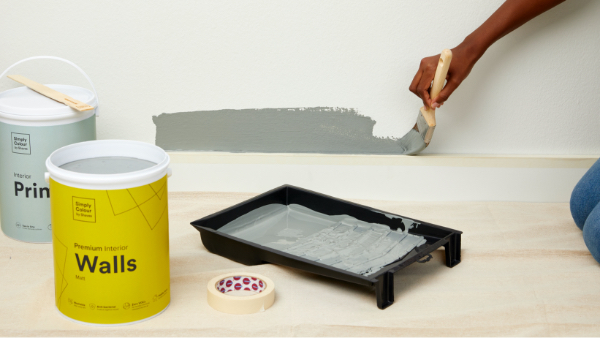
Begin with the edges
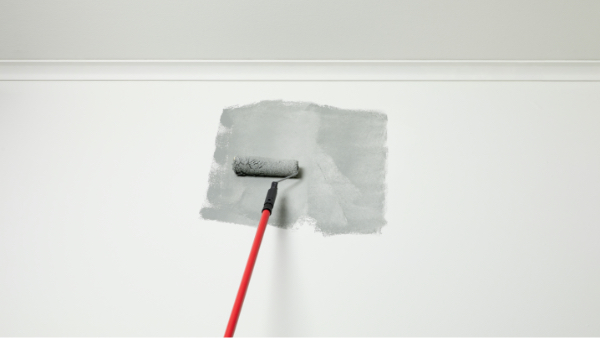
There’s an art to painting a room, and it starts with ‘cutting in’. This refers to starting at the edges and working your way around the sides and corners of a wall. Think of it like outlining the room’s borders before you begin using your roller. Once you do start filling in the rest of the walls, remember to work from top to bottom – that way you’ll avoid streaks, drips and runaway paint.
Once you have covered an area of your wall with paint, refrain from getting carried away and rolling over it again – rather leave it to dry and continue working your way around the room.
Clean up your mess (yes, you!)
Don’t make the common mistake of putting your brushes out of sight ‘for a minute’ while they’re still covered in paint. Rather spend a little extra time thoroughly rinsing your brushes with soap and water. That way, when it comes time to do the next job, you’ll be more willing to pick those brushes back up again!
Simple tip
Never pour paint down the drain. Rather brush your leftover paint onto newspaper and dispose of it. If your paint is finished, clean out the empty containers and recycle them appropriately.